Perfecting a paint job begins well before the first stroke of the brush. Proper paint preparation can make the difference between a professional-looking finish and a frustrating, uneven application.
In this blog, we’ll dive into essential paint prep tips that will set you up for success. we’ll guide you through each step to ensure your walls are ready to receive a flawless coat of paint.
- INSPECT FOR DAMAGES
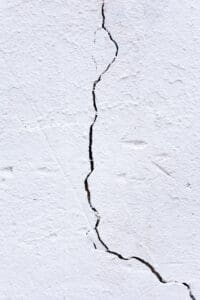
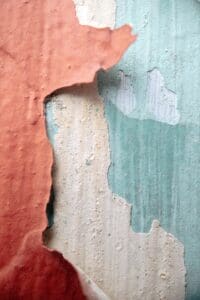
The first and crucial step is to thoroughly inspect your surfaces for any damage. Begin by examining walls for cracks, holes, or peeling paint; wood for splinters, rot, or uneven patches; and metal for rust or dents. Ensure wall has an even surface, addressing these issues beforehand ensures a smooth and professional finish. If walls remain permanently damp, establish source of water penetration and fix the water source, then repair or waterproof the area and let it dry completely.
- PREPARE, REPAIR IF THERE IS DAMAGE & CLEAN SURFACE.
- If surface has cracks, first repair and treat as new work. Remove all loose, flaking and bubbling paint and clean back to raw surface by scraping, sanding or washing. Wipe clean and allow to dry completely.
- If wood is rotten, replace.
- For weathered or previously treated wood, sand it down until you reach bare, smooth wood.
- For rusted metal, remove oxidation and loose rust by sanding or shotblasting. Clean the surface thoroughly with a general-purpose cleaner or degreaser and an abrasive pad, then rinse with water.
- For surfaces with loose particles, such as weathered slurry or granular stone tiles, use high-pressure water or a hard bristle brush to clean, then allow the surface to dry completely.
- DON’T FORGET THE DROP SHEET!
Using a drop sheet is crucial for protecting floors and furniture from paint spills. Spread the sheet over the entire area, including nearby furniture, and use multiple or larger sheets if needed. The Marley Undertile Membrane also works best as a drop sheet. Secure its edges with painter’s tape to keep it in place. This will minimize cleanup and prevent damage.
- PRIME
After ensuring your walls are clean, sanded, and free of any imperfections, the next crucial step in achieving a flawless finish is priming. Depending on the surface you’re working with, different primers may be more suitable, which we’ll explore in detail next.
- New raw plastered interior/exterior walls, prime with Marley Water – based Plaster Primer or Marley Solvent Based Plaster Primer.
- New Gypsum plastered walls – like “Rhinolite” prime with Marley Solvent-based plaster primer or Marley Bonding Liquid.
- New uncoated Galvanized steel or iron, prime with Marley Water-Based Zinc Phosphate Steel Primer.
- No primer required for, uncoated concrete roof tiles, uncoated paving and new wood. For smooth garage floors you might want to use Epoxy floor paint as it provides strong adhesion to surfaces to such surfaces.
Applying a quality primer will not only enhance paint adhesion but also ensure a more even and durable finish.
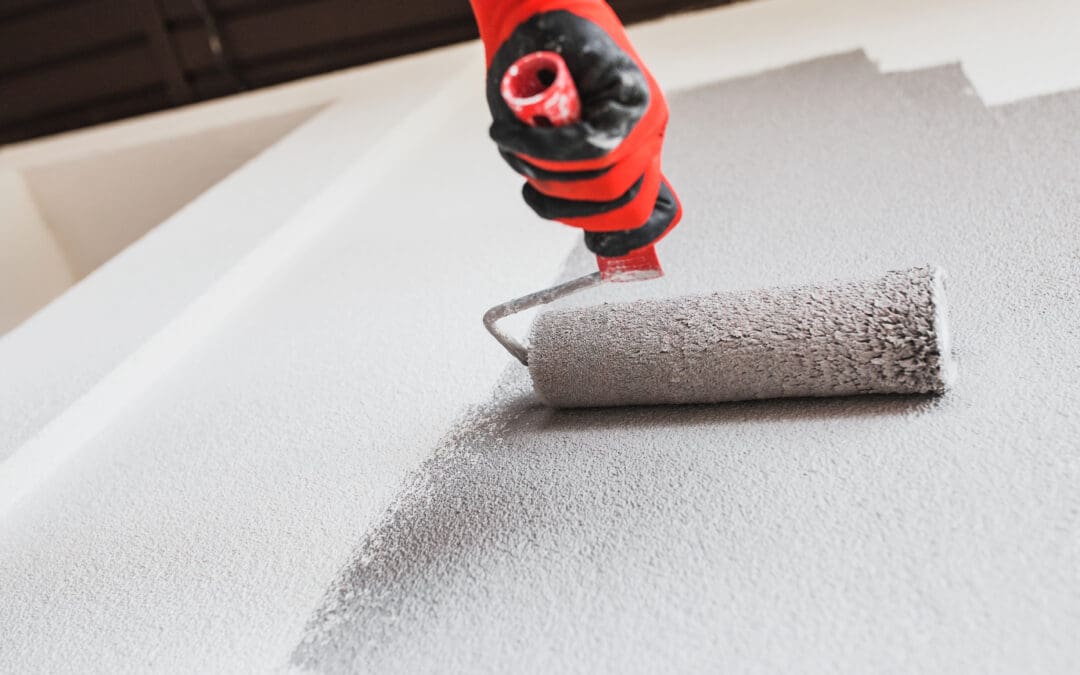
Now you’re ready to grab that paintbrush and start painting with our Marley Multi-surface paints, like our Marley M11 Ultra or Marley M22 Ultimo, finishing with 2x coats. Just remember, taking the time to prep your surfaces really makes all the difference in achieving a stunning result. Enjoy the process and have fun transforming your space!